How To Use Virtual Backgrounds in Adobe Premiere?

How To Use Virtual Backgrounds in Adobe Premiere?

Whether you're recording yourself talking, making a demo reel, or putting together a video to promote your business, virtual backgrounds can take your project to the next level. There are two main types of virtual backgrounds that are commonly used in video compositions and video streams, static virtual backgrounds that use image files and dynamic virtual backgrounds that require a green screen and chroma keys.
In this brief introduction to using virtual backgrounds in Adobe Premier, we will teach you the basics of how to add a static virtual background to your video composition.
Import the video you want to edit
To start, you'll need to import the video you want to edit. To do this, choose File > Import. When you click on Import, a window will pop up that allows you to choose where your video is stored. You can import a video from your computer or from a cloud storage service like Dropbox, Google Drive, or OneDrive.
Zoom in on the area where you want to use a virtual background

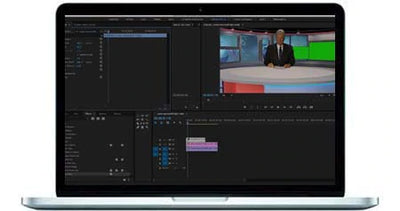
The next step is to zoom in on the area where you want to use a virtual background. If you're using a green screen, you'll need to see your subject clearly and make sure that there aren't any other objects or people lurking behind them.
To do this, use the zoom tool in Premiere. Be sure not to move out of focus at all for this step; if your subject moves out of focus during this process, it will be much harder (and more time-consuming) for Adobe Premiere to figure out what's going on!
Import the image you want to use as a virtual background

The next thing you need to do is make sure that you have an image file of the size and resolution you want. If you are going to use a virtual background in Adobe Premiere Pro or Premier Pro, then the image should be 1920x1080 pixels.
Once you have created your virtual background, you need to import it into Adobe Premiere Pro or Premier Pro. To do this, click the project window and then click Import > File. This will bring up the Import window, where you can choose the image file that you want to import. After choosing an image file from your computer, click Open and then close the Import window.
You now have an image file that has been imported into Adobe Premiere Pro or Premier Pro as a virtual background! Now you'll want to position the image on your timeline and overlay the other clips in your composition on top of your new virtual background.
Set the Opacity for the image
The opacity of a virtual background image in Adobe Premiere can be changed by adjusting the levels of transparency for the image. To do this, open the Virtual Set window, which is located in the Window menu. Then click on the Background tab and click on the drop-down menu at the top right. Choose "Background Image."
Next, choose "Background Image" from the drop-down menu at the top right again. Click on "Properties" to view more settings for this option and then select "Opacity." Change this value to whatever level you want your virtual background image to be transparent at.
Apply color grading schemes
Color grading is a process that helps to give your videos a unique look and feel. It can help to set the tone of your film, add depth or contrast to your images, and even make your footage more visually appealing.
Whether you're working with virtual backgrounds or real ones, Adobe Premiere makes it easy to color grade your shots and create an immersive experience for viewers.
Once your image has been imported, right-click on it in the timeline and select "Color Balance." Then use the sliders on the right side of the screen to adjust the white balance until it looks natural against other elements in your scene.
Next, select "Levels" from the same menu as before and adjust them so that they're roughly similar to each other throughout your timeline (you can also adjust individual clips if needed). Finally, select "Curves" from this same menu once more; this time, adjust the settings so that shadows are darker than any mid-tones in the composition.
Add a border around the image
To add a border around the image, first, select the Edit tab. Then, click on Trim in the toolbar. This will bring up a window with two tabs: Select In and Select Out. The former allows you to choose which area of your video or image you want to trim, while the latter allows you to select where you don't want any cuts made (basically, it's like having an invisible rectangle).
Start by clicking on Select In and then drag from one side of your clip until it reaches its edge (or until it intersects another cut). Next, hold down Alt/Option + Shift while dragging back out toward its center point so that Adobe Premiere can connect both points together as one continuous line. Now click on Trim again and select Add Border.
Make sure that the color of your clothing matches the color of the virtual background image
The most important thing is to make sure that the color of your clothes matches the colors in the photo you are using as your background so that it all blends together. If you're wearing a dark shirt, use a dark background. This will help keep things looking sharp and professional-looking.
If you wear light clothing, then use a light background (or vice versa). This can be tricky if you have any white pieces of clothing because they'll stand out more on their own than they would against a darker backdrop.
Virtual backgrounds can turn even a simple video into something special
In the past, creating a virtual background was considered a complicated process. Today, however, Adobe Premiere makes it easy to create a virtual background with just a few clicks of the mouse.
Using a video editing program such as Adobe Premiere is one of the best and most affordable ways to add interest and professionalism to your videos. With this software, you can turn even a simple video like an interview or presentation into something special.
You can use virtual backgrounds in any situation where you need an interesting backdrop for your scene but don't have access to it when shooting footage. You can use them while filming outdoors if you want scenes that look like they were filmed in exotic locations or on location rather than on set at home or work; you can place yourself anywhere from outer space (or another planet) to underwater by using these tools!
Conclusion

Using virtual backgrounds is an exciting way to enhance your videos and create a unique production. As you can see, there are several different steps that need to be taken in order to get started with this process. Hopefully, after reading through our guide, you have a better understanding of how it all works so that when it comes time for your next video project, using images as static virtual backgrounds will come naturally!
SOURCES:
How to Add a Background Image | Adobe Premiere Pro Tutorial - YouTube
How to use Green Screen in Premiere Pro 2020 - YouTube
How to create a background for green screen footage | Adobe Premiere Pro tutorials
How do I change backgrounds in Adobe Premiere? – Virtual Set Lab (virtual-studio-set.com)
Discover | Adobe Creative Cloud
How do I create a solid black background in Premiere? - Video Production Stack Exchange