How do I add a Zoom call to vMix and stream it live?

Introduction
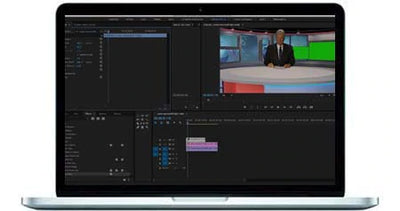
Ever wanted to interview a guest live on your program? Using vMix and zoom, you can use a virtual set + interview a guest live at the same time!
Scroll down to watch or read about how you can import a live zoom call into your next live video production!
- - -
Ideally, to add Zoom to your video production, you want to run the application on a separate computer. However, this may not be feasible for every user. So, it can be highly beneficial to learn how to do it on your one computer, possibly using multiple monitors for the best possible viewer experience.
How to add a Zoom call to vMix
VB-Cable Virtual Audio Device software - Latest version of Newtek's NDI Tool Pack which contains the NDI Virtual Input program we will be using in this guide.
To get the process started, you’ll need to download software from the internet. You’ll need:
-
Zoom Meeting App
https://zoom.us/download
-
VB-Cable Virtual Audio Device software
https://www.vb-audio.com/Cable/
-
Newtek's NDI Tool Pack, which contains the NDI Virtual Input program
https://ndi.tv/tools/
-
Two separate displays connected to the same graphics card
(preferred, but there is an option if this isn't possible)
Here’s a rundown of what the process entails:
You’ll be sending out your vMix NDI output. This will make it available to Zoom using the NDI Virtual Input. This will route the Zoom audio using the VB audio cable. This will then capture the Zoom display monitor into vMix or capturing the Zoom window.
Screen capture method
The screen capture method will allow you to capture your full screen display from a second monitor. This works with pretty much most versions of Windows, and will offer the best performance.
Here’s how to get started:
- Open the vMix app on your computer.
- Click Settings in the top right corner.
- Then, go to Outputs/NDI/SRT. The next step is to make the vMix output available on the local network via NDI. Under Output 1, turn NDI by ticking the NDI button. The button should turn green, and it should say NDI On.
- Then, click the gear icon next to the NDI button. Under Audio Channels, select BusA. Using BusA audio means you can control what audio is being sent back to Zoom, avoiding any sort of audio feedback. Click OK at the bottom.
- Within the Settings, click Audio Outputs. Enable BusA under the drop-down menu. It should say Enabled. Click OK to close out the Settings menu.
- Go to the Audio Mixer in the bottom right corner. Activate the BusA button on the audio inputs you want to send to Zoom, such as your Microphone input. The A should be green. This will send the audio output by the A Bus in NDI into Zoom. If you set up a different Bus, you could either select A or B, or right-click on it to select other Buses that you have available or enabled in vMix. Consider turning down the Microphone volume to prevent you from hearing on your voice. To do that, click on the cog icon on the input. At the bottom left corner, click the headphones icon to toggle on or off.
- Next, take a look at the Newtek NDI Virtual Input. Go to your Settings in Windows. To do this, click the Windows icon in the Start Menu. In the search bar, enter NDI Virtual Input. If you properly installed the software, it should pop up in the search results. Click on it to open the app. NDI Virtual Output will appear in the task tray at the bottom right corner of the screen. Click the arrow to expand the task tray, and you should see the NDI Virtual Input icon. When you right click on the icon, you’ll be able to see any type of application through which you want NDI Virtual Input to run. Choose your computer name. Then, click vMix - Output 1. This is the output you want to send to your Zoom call.
- Now that you’ve made your vMix output available to be used in Zoom, now you can open the Zoom app. Ensure that Zoom is displayed on fullscreen on a secondary monitor, as this will allow you to easily capture it into vMix.
- The next step is to configure the Zoom audio. Select the arrow next to the microphone icon. Under the Select a Microphone section, select Line (NewTek NDI Audio). Under Select a Speaker, select CABLE Input (VB-Audio Virtual Cable). The Microphone option sends the audio from vMix to Zoom via NDI. The Speakers option allows you to send the audio Zoom to vMix using the VB Cable Audio Device.
- Configure the Zoom video source, Click the arrow next to the camera icon. Under Select a Camera, select Newtek NDI Video. On your computer, you’ll have your vMix output coming into your Zoom call. Your computer will send the video to the other screen.
- Start your Zoom meeting and invite guests to the meeting. Once they’ve joined, add them into vMix. To do this, select the Add Input button at the bottom left corner of the screen. Select the NDI/Desktop Capture option. Then, go to Load Desktop Capture, and select the display you’re currently running Zoom on. Then, click OK. Your Zoom call will now come in through your computer, which is now available in your vMix production to be used.
- Add the audio. In the same Input Select menu, click Audio Output. Under the Audio Device dropdown menu, select the CABLE Output (VB-Audio Virtual Cable). Then, click OK. You should now be able to hear the audio from that video that’s now playing in Zoom. When you have all of your audio routing, one thing to consider is not turning on BusA for the Zoom audio.that’s coming in. Otherwise, it will loop around.
Window capture method (alt method if you don't have a second monitor attached)
The window capture method captures only the Zoom window. This method only works on the latest version of Windows.!0 and vMix 23.
Using the window capture method, the audio will be exactly the same as it would be through the screen capture method. The window capture method is just a different way of capturing the video from Zoom.
To get started:
- Click the Add Input button in the bottom left corner within the vMix app.
- Then, go to the NDI/Display Capture option.
- After that, select Local Desktop Capture.
- Select which Zoom window you’re using. From the Windows Capture Method dropdown menu, select WindowsGraphicsCapture. Click OK.
Now that you’ve added the Zoom window, you can start using it as a part of your production. You might consider setting up a second monitor because the direct windows capture doesn’t allow you to get rid of the cursor (although, you can always move the cursor out of the way, but we sometimes forget!).
When you have it on a second monitor, this issue doesn’t matter. Another tip is to avoid minimizing the window, or it will disappear. So, ensure that it’s maximized at all times.
Best Practices for Using vMix With Zoom
It’s best to use two monitors for live streaming and live production if you can. That way, you can monitor the multi view or your program output during the production. You may see other methods for using Zoom with vMix, but the methods outlined in this post are the ones that vMix themselves endorses.
There are other video rendering options in your Zoom settings, but they can cause high CPU load and aren’t the best to use while you’re doing a live stream and live production on the same computer (since you can max out your computer and/or overheat).
Thanks for taking a look at this tutorial and happy streaming!